A sudden black screen, flickering display, or distorted images on your Chromebook can be incredibly frustrating. It’s not just a minor annoyance; it can halt your work, disrupt your learning, or cut short your entertainment. When you’re facing a display issue, it often feels like a brick wall, but thankfully, most common problems with resolving Chromebook screen & display issues have straightforward solutions you can tackle yourself.
Think of your Chromebook's screen as the window to its soul. When that window fogs up, cracks, or simply refuses to open, it's time to become a detective. This guide will walk you through a systematic approach, from the simplest checks to more advanced diagnostics, helping you understand why your screen is misbehaving and, more importantly, how to bring it back to life.
At a Glance: Quick Fixes for Your Chromebook Display
Before diving deep, here are the most common initial steps to get your screen working again:
- Plug it in: Ensure your Chromebook is charged and connected to power.
- Adjust brightness: Use keyboard shortcuts or settings to confirm it's not just dimmed.
- Select internal display: Press
Ctrl + Maximize(oftenF4orF5) to toggle displays. - Disconnect everything: Remove all external peripherals (USB drives, monitors, etc.).
- Power cycle: Hold
Power + Refreshto force a restart. - Connect to an external monitor: See if the Chromebook displays an image elsewhere.
- Check for physical damage: Inspect the screen for cracks or liquid spills.
The First Steps: Basic Checks When Your Screen Acts Up
Often, the most complex-seeming problems have the simplest solutions. Before you panic, let's run through some foundational troubleshooting. These steps are quick, easy, and require no technical expertise.
Power Up and Listen: Is Your Chromebook Even On?
A black screen doesn't always mean a faulty display. Sometimes, your Chromebook simply isn't receiving power or isn't turning on fully.
- Plug in the charger: Connect your Chromebook to a known working power outlet.
- Look for activity: Does the charging indicator light come on? Do you hear the fan whirring faintly? These signs suggest your Chromebook is powered on, and the issue likely lies with the screen itself rather than a complete power failure. If there's no light or sound, your problem might be power-related, which we’ll cover next.
- Wait a few minutes: Give it 10-15 minutes, especially if the battery was completely drained.
Brightness Check: The "Too Dim to See" Scenario
It sounds obvious, but a display set to its lowest brightness can appear completely black, especially in a brightly lit room.
- Use keyboard keys: Look for keys with sun icons (often
F6andF7orF4andF5depending on your model) and press them repeatedly to increase brightness. Sometimes, you might need to hold theFnkey simultaneously. - Check Chrome OS settings (if you can see anything): If you're getting a very faint image, click on the clock in the bottom-right corner, go to "Settings," then "Display," and use the brightness slider.
Internal Display Selection: Is Your Chromebook Looking for Another Screen?
Chromebooks are great at managing multiple displays, but sometimes they can get "stuck" trying to output to a non-existent external monitor, leaving your internal screen blank.
- Press
Ctrl + Maximize: TheMaximizekey is typically located whereF4orF5would be on a traditional keyboard (it looks like a rectangle with two arrows pointing outward). PressingCtrland this key simultaneously forces your Chromebook to cycle through its available display outputs, ensuring it attempts to use its internal screen. Repeat a few times if necessary.
Unplug Everything: Eliminating External Interference
Sometimes, a connected USB device, an SD card, or even an external monitor that's no longer attached can cause a conflict that prevents your internal screen from displaying correctly.
- Remove all external devices: Disconnect every single peripheral—USB drives, headphones, external monitors, SD cards, anything plugged into a port.
- Restart: After disconnecting, try powering your Chromebook off and on again.
The Power Cycle Reboot: A Hard Reset for Stubborn Software Glitches
This isn't just a simple restart; a power cycle forces your Chromebook to completely shut down and clear its temporary memory, which can resolve software hangs or minor glitches affecting the display.
- Hold
Power + Refresh: Locate theRefreshkey (often whereF3would be, depicted as a circular arrow). Press and hold thePowerbutton and theRefreshkey simultaneously for about 10 seconds. - Release and wait: Your Chromebook should turn off and then restart. Observe if the screen comes back to life during the boot sequence.
Beyond the Basics: Diagnosing Deeper Issues
If the initial quick fixes didn't bring your screen back, it's time to dig a little deeper. We'll start systematically investigating potential hardware and software culprits, moving from power issues to internal components.
Is It Charging? Power Delivery Troubles
A display problem can often be a symptom of an underlying power issue. If your Chromebook isn't getting enough juice, or its battery is failing, the screen might be the first thing to go dark.
Outlet Check: The Simplest Test
- Verify the electrical outlet: Plug another appliance (like a lamp or phone charger) into the same outlet to ensure it's functional. A dead outlet is a surprisingly common reason for a "dead" Chromebook.
Listen for Life: More Power Clues
- Check cooling system/LED: If your Chromebook has a cooling fan, listen for it. Observe any status LEDs on the device (power, charging indicators). No activity at all—no lights, no sounds—strongly points to a lack of power, either from the charger or the battery.
Try a Different Charger: The Cable's Role
- Swap adapters: If possible, try using a known good, compatible charging adapter. Over time, charging cables can fray internally, or the adapter itself can fail. Ensure the new charger matches the voltage and amperage requirements of your Chromebook.
Battery Clues: When Power is Intermittent
- Observe power dependency: Does your screen only turn on or work when the Chromebook is directly connected to the charger? If so, this is a strong indicator that your internal battery is either completely depleted and refusing to hold a charge, or it's faulty and needs replacement.
External Monitor SOS: Pinpointing Display Failure
This is a critical diagnostic step. If your Chromebook can display an image on an external screen, it immediately tells us that the core components (processor, graphics chip, RAM, Chrome OS) are working correctly, narrowing the problem down to your Chromebook's internal display assembly or its connection.
Test with an External Display: The Litmus Test
- Connect to a monitor or TV: Use an HDMI, DisplayPort, or USB-C cable (depending on your Chromebook and monitor) to connect your Chromebook to an external screen.
- Observe: Does an image appear on the external display? If it does, great! Your Chromebook's "brain" is fine.
Switching Views: Ensuring the Output is Correct
- Press
Ctrl + Maximize(F4/F5): Even with an external monitor connected, you might need to use this shortcut to ensure your Chromebook is sending the video signal to the correct display. Cycle through the options until an image appears on the external screen.
What This Means for Your Internal Screen
If your Chrome OS works perfectly on the external display but refuses to show anything on its built-in screen, you've likely identified the culprit: the main internal display panel itself is defective, or its connection is faulty. This means the hardware of the screen, or the cable connecting it, is the problem.
When Chrome OS Itself Stumbles: Recovery Options
Sometimes, the operating system itself can become corrupted, leading to display issues, even a black screen. A Chrome OS Recovery is a powerful tool, essentially reinstalling the entire operating system.
Preparing for Recovery: What You'll Need
- Requirement: An empty USB drive with at least 8 GB of storage. All data on this drive will be erased.
- Access to another computer: You'll need a working computer (another Chromebook, Windows PC, or Mac) with Google Chrome installed.
Creating Your Recovery Media: The USB Lifeline
- Install the Chromebook Recovery Utility: On your working computer, open Google Chrome, search for and install the "Chromebook Recovery Utility" extension from the Chrome Web Store.
- Follow the prompts: Launch the utility, select your Chromebook model, and follow the on-screen instructions to create the recovery media on your USB drive.
Performing the Recovery: Reinstalling Chrome OS
- Turn off your problematic Chromebook: Ensure it's completely powered down and connected to its charger.
- Enter Recovery Mode: Press and hold
Esc + Refresh(F3) and then press thePowerbutton. Release thePowerbutton once the device starts, but continue holdingEsc + Refreshuntil you see a prompt on the screen asking for the recovery disk. - Insert the USB drive: Insert your newly created USB recovery disk.
- Follow instructions: The Chromebook will automatically detect the recovery media and guide you through the reinstallation process. This can take some time.
- Remove USB: Once prompted, remove the USB drive. Your Chromebook will restart.
Post-Recovery Setup: Fresh Start
- Complete initial setup: Follow the on-screen prompts to set up your Chromebook as if it were new.
- Check display: See if the black screen or other display issues are now resolved.
The Unsung Hero: Your Chromebook's Battery
Beyond just delivering power, the battery itself can be a source of display problems if it's faulty or unable to communicate properly with the system.
Give it a Good Charge: The Basics Revisited
- Connect charger and wait: Connect your charger and allow at least 15 minutes for a potential charge. Verify the charging indicator light is on and behaving as expected (e.g., solid amber for charging, solid green for charged).
The Pinhole Reset: A Battery Soft Reset
Many Chromebooks include a small "pinhole" reset button, often on the bottom or side, designed to perform a hardware reset of the battery and system management controller without opening the device.
- Locate the pinhole: If available on your model, find the tiny pinhole.
- Press gently: Insert a straightened paperclip or a SIM ejector tool gently into the pinhole and press for about 3-5 seconds.
- Attempt to power on: After releasing, try to power on your Chromebook. This can sometimes resolve issues where the battery state is confused.
Considering a Replacement: When All Else Fails
If your Chromebook only works when plugged in, or shows no signs of life even after charging and a pinhole reset, a faulty battery is a strong candidate. This typically requires opening the device for replacement.
Physical Damage: The Obvious Culprit
Sometimes, the simplest explanation is the correct one. Chromebooks are portable, and portability comes with risks of bumps, drops, and spills.
A Close Inspection: Look for the Obvious
- Power off: Ensure your Chromebook is completely turned off.
- Examine the internal display: Carefully inspect the screen for any visible cracks, deep scratches, pressure marks, or signs of liquid damage (water stains, sticky residue).
- Check the bezel/frame: Also, look at the plastic bezel and frame surrounding the screen for any signs of impact or deformation. Even a slight bend in the frame can put pressure on the display panel, causing issues.
What to Do if You Find Damage
If you discover physical damage, especially cracks or liquid intrusion, the internal display panel itself is almost certainly broken. While replacing a screen isn't usually a simple task, it's often more cost-effective than buying a whole new Chromebook.
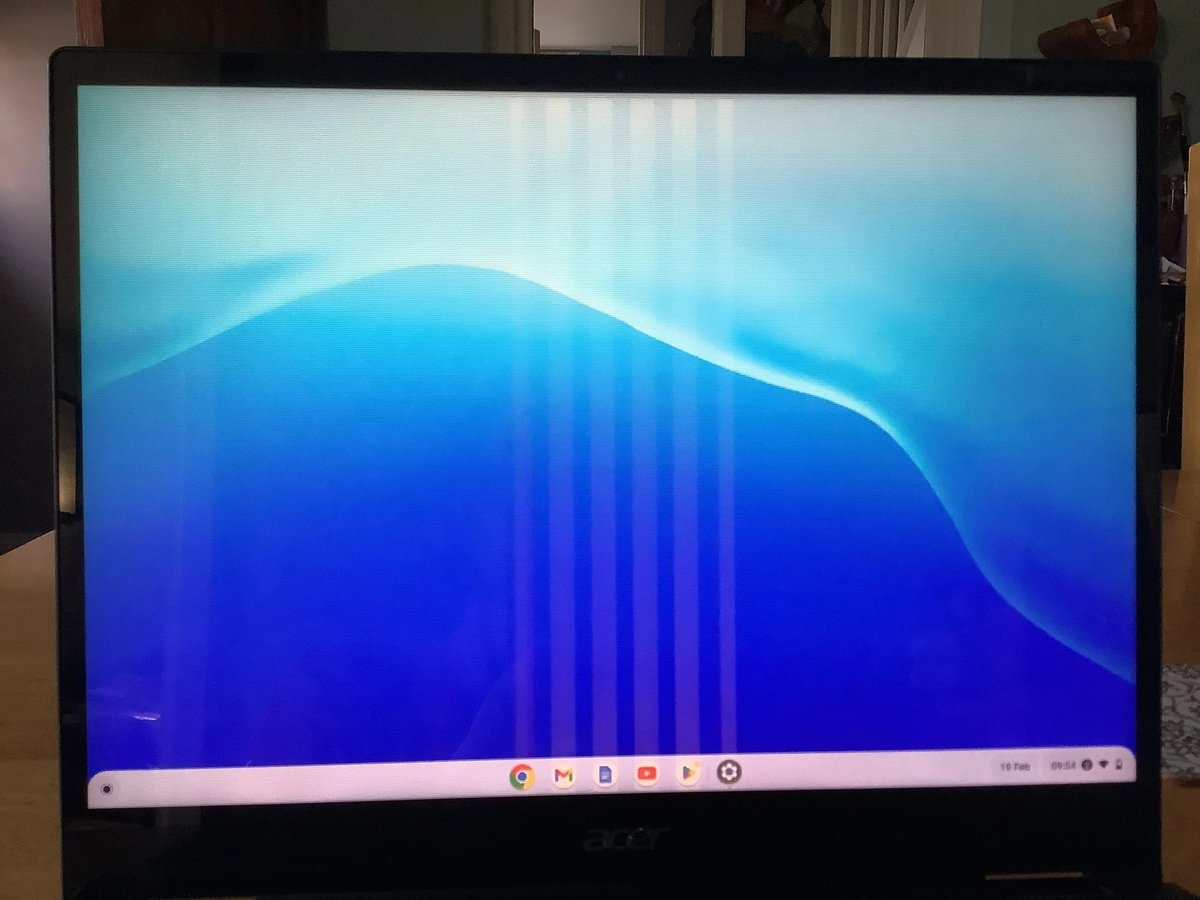
The Hidden Connection: Display Cable Woes
Even if the screen itself looks fine, the internal cable connecting it to the motherboard can be the weak link. This issue usually manifests as flickering, distorted images, lines on the screen, or a complete black screen.
A Word of Caution: Opening Your Chromebook
This step involves opening your Chromebook, which can void warranties and carries a risk of further damage if not done carefully. Proceed only if you're comfortable with basic electronics repair and have the right tools. Many models have specific disassembly guides available online (e.g., on iFixit).
Locating and Securing the Cable: The Connection Points
- Open the Chromebook: Carefully open the back panel or keyboard assembly (depending on your model) to access the internal components.
- Locate the display cable: The display cable is usually a flat, ribbon-like cable that runs from the bottom of the screen assembly to a connector on the motherboard. It often has a small, delicate locking mechanism.
- Verify connection: Gently check if the cable is securely plugged into both the LCD panel connection and the motherboard connector. If it appears loose, carefully unclip the locking mechanism, gently reseat the cable, and secure the clip again.
Visual Damage Check: Frayed or Burned
- Inspect the cable: While the Chromebook is open, visually inspect the display cable itself. Look for any signs of damage: bends, creases, tears, frayed edges, or especially signs of burning or liquid damage on the cable or its connectors.
- Replace if damaged: If the cable shows any signs of damage, it needs to be replaced. Ensure you order the correct replacement cable for your specific Chromebook model.
Motherboard Mayhem: Advanced Diagnostics
When all else fails, the problem might reside deeper within the Chromebook's "brain"—the motherboard. These are more advanced troubleshooting steps, often requiring a level of comfort with internal hardware.
Cooling and Cleanliness: Overheating's Impact
- Check CPU heatsink: Ensure the CPU heatsink (if present) is correctly attached and has appropriate thermal paste. Overheating can cause display issues as the system tries to protect itself.
- Dust removal: Use compressed air to carefully clean accumulated dust and debris from internal components, especially fans and vents, to maintain proper airflow. Dust can cause overheating and intermittent component failure.
CMOS Battery Reset: Defaulting Settings
Some Chromebooks have a small CMOS battery (like a watch battery) on the motherboard. Disconnecting and reconnecting it can reset the BIOS/UEFI settings to default, which occasionally resolves boot or display issues.
- Locate and remove: Carefully locate the CMOS battery (it might be in a small holder or connected by wires). Gently remove it.
- Wait and reinstall: Wait for about 30 seconds to a minute, then reinsert it. This is similar to the pinhole reset but applies to deeper firmware settings.
RAM Module: A Wobbly Memory Connection
Like other computers, a Chromebook’s RAM (Random Access Memory) can sometimes cause display problems if it's not seated correctly.
- Verify seating: If your Chromebook has user-accessible RAM modules (not all do, many are soldered), gently press down on the module(s) to ensure they are fully seated in their slots.
- Re-insert or replace: If possible, try removing and then re-inserting the RAM module. If you have multiple modules, try booting with just one at a time to identify a potentially faulty stick.
Circuit Board Detective Work: Visible Flaws
- Visual inspection: With the Chromebook open, visually inspect the circuit boards. Look for any signs of burns, scorch marks, bulging capacitors, or other visibly damaged components, especially near where the display cable connects.
- Motherboard replacement: If you find visible damage on the motherboard, particularly around the display circuitry, the board likely needs professional repair or replacement. This is usually the most expensive fix.
Still Struggling? General Software Solutions
Even after all the hardware checks, a lingering software bug in Chrome OS can still cause display headaches. These last few options tackle those deeper software issues.
Keep Your Chrome OS Current: Updates are Key
Sometimes, display glitches are resolved by a simple software update. Google regularly pushes out updates that include bug fixes, performance enhancements, and hardware compatibility improvements.
- Check for updates: If you can get any image on your screen (even if it's distorted), click on the clock in the bottom-right corner. Go to "Settings" > "About Chrome OS" > "Check for Updates."
- Restart: If an update is available, install it and restart your Chromebook.
A Gentle Display Reset: Back to Default
Chrome OS offers a way to reset display settings to their factory defaults without performing a full system wipe. This can be useful if a custom resolution or refresh rate is causing issues.
- Power off: Ensure your Chromebook is completely off.
- Hold
RefreshandPower: Hold down theRefreshkey, then press and release thePowerbutton. Continue holdingRefreshuntil the "Chrome OS is missing or damaged" screen appears. - Release and restart: Release the
Refreshkey. Your Chromebook will usually reboot shortly, resetting its display parameters. This does NOT erase your data.
The Nuclear Option: Powerwash
If you suspect a deep-seated software issue that even a Chrome OS Recovery couldn't fix, a Powerwash (factory reset) is the ultimate solution. However, this will erase ALL local data on your Chromebook.
- BACK UP EVERYTHING: Before you even think about a Powerwash, ensure all your important files, photos, and documents are backed up to Google Drive or an external storage device. Once you initiate a Powerwash, there's no going back.
- Initiate Powerwash: If your screen is visible enough, click the clock in the bottom-right corner > "Settings" > "Advanced" > "Reset settings" > "Powerwash" > "Reset."
- Follow prompts: Confirm your decision and let the Chromebook reset. You'll then go through the initial setup process again.
- Evaluate: After a clean setup, check if the display issues are resolved. If they persist even after a Powerwash, it's almost certainly a hardware problem.
When to Throw in the Towel (and Call a Pro)
You've tried everything. You've systematically worked through basic checks, external monitor tests, software resets, and even dared to peek inside your Chromebook. If your display issues still persist, it's a clear sign that the problem requires professional attention.
Consider seeking professional help if:
- No image at all appears, even on an external monitor, after trying all software and basic hardware resets.
- You find physical damage to internal components (e.g., motherboard burns) and are not equipped to replace them.
- You've identified a faulty internal component (like the display panel or motherboard) and are uncomfortable performing the replacement yourself.
- Your Chromebook is still under warranty. Attempting internal repairs might void it.
Contact your Chromebook's manufacturer support, a certified technician, or an authorized service center. Provide them with a clear, concise summary of the troubleshooting steps you've already taken. This information is incredibly valuable and will help them diagnose the issue more efficiently. For more general troubleshooting tips, you might find answers on troubleshooting your glitching Chromebook.
Final Thoughts on Keeping Your Chromebook Screen Healthy
While many display issues are solvable, prevention is always the best cure. Treat your Chromebook's screen with care: avoid dropping it, don't close the lid with objects on the keyboard, and keep liquids far away. Regular Chrome OS updates will also keep your system running smoothly, potentially heading off software-related glitches.
Facing a blank or flickering screen can feel like a daunting challenge, but by following a logical process and understanding the common culprits, you significantly increase your chances of bringing your Chromebook's display back to vibrant life.