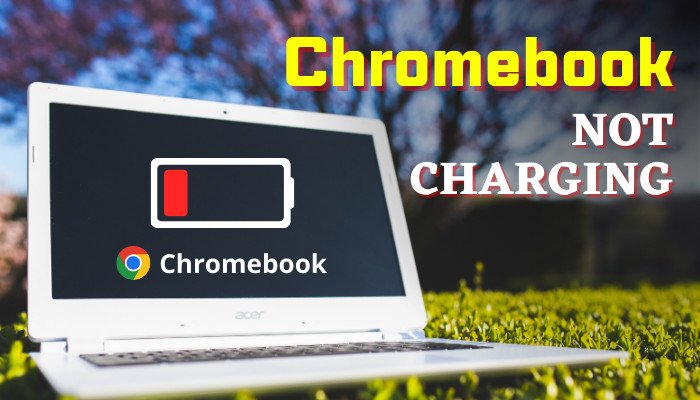
Few things are as frustrating as reaching for your Chromebook, only to find it unresponsive, refusing to charge, or simply dead. That sinking feeling of a crucial tool suddenly out of commission can derail your entire day. But before you panic or resign yourself to an expensive repair, know this: many common power, battery, and charging issues on Chromebooks have surprisingly straightforward solutions you can tackle yourself.
This guide will walk you through a systematic approach to diagnosing and fixing these problems, transforming you from a frustrated user into a confident troubleshooter. We'll cover everything from simple cable checks to more advanced software resets and hardware diagnostics, ensuring you have the most useful, trustworthy, and actionable advice at your fingertips.
At a Glance: Your First Steps to Revival
Before diving deep, here are the quickest checks and fixes to try if your Chromebook isn't powering on or charging:
- Check Connections: Ensure all cables are snugly plugged into the Chromebook, adapter, and wall.
- Inspect for Damage: Look for frayed cables, bent pins in the charging port, or damaged adapters.
- Try a Different Outlet: Rule out a faulty wall socket.
- Perform a Hard Reset: Disconnect charger, hold power for 10 seconds, then reconnect and try again.
- Remove Peripherals: Unplug any USB devices, headphones, or HDMI cables.
- Observe Indicator Lights: Does your Chromebook show any sign of receiving power?
The First Line of Defense: Initial Checks & Quick Fixes
When your Chromebook acts up, it's easy to jump to conclusions about major malfunctions. However, a significant percentage of power and charging problems stem from simple, easily overlooked issues. Starting with these basic checks can save you time, money, and a lot of headaches.
Secure Your Power Connection & Test the Outlet
It might sound obvious, but loose connections are a prime culprit. First, ensure your Chromebook's charging adapter is securely plugged into the device. Give it a gentle wiggle to confirm it's seated properly. Next, verify that the adapter itself is firmly plugged into a functional wall power outlet. Sometimes, the brick can partially come out of the socket without you noticing.
To truly rule out the outlet as the problem, try plugging another device, like a lamp or a phone charger, into the same power outlet. If the other device doesn't power on, you've found your culprit: the outlet, not your Chromebook. Move to a different outlet and try charging again.
Scrutinize Your Cable and Adapter for Damage
Over time, charging cables and adapters endure significant wear and tear. They get bent, twisted, and sometimes even chewed by pets. Carefully examine your charging cable from end to end for any visible signs of damage, such as fraying, cuts, or exposed wires. Pay close attention to the points where the cable meets the plugs, as these are common failure points.
Similarly, inspect the charging adapter (the "brick" part) for cracks, scorch marks, or any unusual bulging. If you find any damage, or even if you don't but suspect the cable or adapter, the simplest solution is to try a different, compatible charging cable and adapter. Using a known good charger from another device or a friend's Chromebook can quickly tell you if your original charger is the issue. Always ensure the replacement adapter matches the voltage and amperage requirements of your Chromebook to prevent further damage.
Does the Charging Indicator Light Up?
Many Chromebooks have a small LED indicator light that illuminates or changes color when the device is receiving power and charging. This light is your first visual cue. When you plug in your Chromebook, observe this light carefully. Does it come on? Does it blink? Does it change from red to green, or amber to white?
If the light doesn't illuminate at all, it's a strong sign that power isn't reaching the battery or the charging circuit. This could point back to a faulty cable, adapter, outlet, or a more internal issue. If it does light up, even briefly, it suggests power is flowing, and the problem might lie with the battery itself or the Chromebook's ability to utilize that power.
The Magic of a Hard Reset
A hard reset is often the unsung hero of Chromebook troubleshooting. It's not a factory reset, and it won't erase your data. Instead, it's like giving your Chromebook's internal components a quick "reboot," clearing any temporary glitches in the hardware connections, especially those related to power management.
Here's how to do it:
- Disconnect the charger from your Chromebook.
- Press and hold the power button for at least 10 seconds.
- Release the power button.
- Reconnect the charger and attempt to power on your Chromebook.
This process forces the device to shut down completely and reinitialize its hardware, which can often resolve minor power supply or battery recognition issues.
Disconnect All External Devices
Sometimes, external peripherals can draw too much power or interfere with the Chromebook's startup sequence. USB drives, external keyboards, headphones, or HDMI cables might be creating a power draw that prevents the device from booting or charging correctly.
Temporarily remove all external devices from your Chromebook. Then, try to power it on and see if it begins charging or boots up. If it does, you can connect your external devices one by one after the Chromebook has fully started, helping you identify if a specific peripheral is causing the issue.
The Power Cycle: A Simple Restart
A power cycle is a slightly different approach to resetting your device, ensuring a complete shutdown and restart. This can clear temporary software conflicts that might be preventing proper charging or power management.
To perform a power cycle:
- Press and hold the power button for at least 10 seconds to force a complete shutdown.
- Wait for 30 seconds to allow all internal components to fully discharge.
- Press the power button again to restart your Chromebook.
If your Chromebook was experiencing a software hang-up, this simple step can often bring it back to life.
When the Battery Itself Is the Culprit
If your Chromebook still refuses to cooperate after the initial checks, the problem might be rooted in the battery itself. Batteries have a finite lifespan and can degrade over time, leading to issues with charging, holding a charge, or even preventing the device from powering on.
Check Battery Level and Give It Time
A completely drained battery might not show immediate signs of life, even when plugged in. Connect your Chromebook to a working charger and outlet, and then simply leave it plugged in for at least 15 minutes, or even longer, up to an hour. Sometimes, the battery needs a significant trickle charge to reach a level where the charging indicator illuminates or the device can power on. If, after this time, there's still no charging indicator or sign of life, then the battery could indeed be dead or malfunctioning internally.
Resetting the Battery: The Pinhole Method
Some Chromebook models include a small, recessed pinhole reset button. This button directly interacts with the battery's internal controller, often resolving issues where the battery isn't being recognized or isn't charging correctly.
Look for a tiny pinhole on the bottom or side of your Chromebook. It's usually very small and might be labeled with a battery icon or nothing at all. Using a paperclip or a similar thin, blunt tool, gently press and hold the button inside the pinhole for about 3-5 seconds. You won't feel a click, but the internal circuit will reset. Release the button, then try plugging in and powering on your Chromebook.
Verify Battery Health with CROSH
Chrome OS has a built-in diagnostic shell called CROSH (Chrome Shell) that allows you to run various tests, including one for your battery's health. This is an invaluable tool for determining if your battery is nearing the end of its life.
Here's how to check your battery health:
- From your Chromebook's desktop, press Ctrl + Alt + T. This will open the CROSH terminal.
- Type the command
battery_testand press Enter. You can optionally add a test length in seconds, for example,battery_test 60for a 60-second test. If no length is specified, it defaults to 300 seconds (5 minutes). - CROSH will immediately display your battery's health percentage. A healthy battery should show a high percentage, typically above 80-90%. As the battery ages, this percentage will decrease. The test will continue to run, providing additional information upon completion, such as discharge rate.
If your battery health is significantly low (e.g., below 50-60%), it's a strong indication that the battery's capacity has degraded and it may be struggling to hold a charge or perform optimally.
When It's Time: Replacing the Battery
If all the above steps fail and the CROSH test confirms poor battery health, a battery replacement might be necessary. Some older Chromebook models have user-removable batteries, which makes replacement relatively straightforward. For most modern Chromebooks, however, the battery is internal and requires opening the device.
If your battery is removable, you can try running the device on direct power without the battery inserted, just to confirm the issue isn't with other components. If the device powers on without the battery, it strongly points to the battery being the sole issue.
For internal batteries, consult your Chromebook's specific service manual or search for guides for your exact model. Battery replacement can be a delicate process, involving small screws, ribbon cables, and sometimes adhesive. If you're not comfortable with DIY electronics repair, it's best to seek professional assistance.
Clearing the Path: Charging Port Problems
A malfunctioning charging port is a common, yet often overlooked, cause of charging failures. Even if your cable and adapter are perfect, a compromised port will prevent power from reaching your Chromebook's internal components.
Inspect the Charging Port for Damage
Shine a bright light into your Chromebook's charging port. Look closely for any signs of physical damage:
- Bent or missing pins: This is especially common for USB-C ports, where the small central tab can get bent or broken.
- Corrosion: Green or blue discoloration can indicate moisture damage.
- Loose port: Does the port wiggle excessively when you insert the charger?
- Debris: Are there dust bunnies, lint, or other foreign objects obstructing the connection?
Even minor damage can prevent a proper electrical connection. If you see any obvious physical damage, proceed with extreme caution or consider professional repair.
Carefully Clean the Charging Port
Often, the problem isn't damage but simply accumulated gunk. Dust, lint, and other debris can get lodged deep inside the charging port, preventing the charger from making full contact.
To clean the port safely:
- Turn off your Chromebook completely. This is crucial to prevent short circuits.
- Use a can of compressed air or a dust blower to gently blow out any loose debris. Hold the can upright to avoid spraying propellant.
- If compressed air isn't enough, you can carefully use a non-conductive tool. A wooden toothpick or a plastic dental pick can work well. Avoid anything metallic like a paperclip, as it could short-circuit the port.
- For stubborn grime, you can dampen a cotton swab with a small amount of 90% isopropyl rubbing alcohol. Gently swab the inside of the port, being careful not to leave any cotton fibers behind. Allow the port to dry completely for at least 15-20 minutes before attempting to plug in the charger.
Take your time and be extremely gentle during cleaning to avoid causing further damage.
When to Consider Port or Daughterboard Replacement
If after inspection and thorough cleaning, you still observe visible damage (like severely bent pins) or the port remains unresponsive, the physical charging port itself is likely faulty. In many Chromebooks, the charging port is soldered directly onto a small circuit board called a daughterboard, which then connects to the main motherboard. In other models, especially those with USB-C, the port might be directly on the motherboard.
Replacing a daughterboard is generally less complex than replacing a port soldered directly onto the motherboard, as it's a modular component. However, this is a more advanced repair that requires specific tools, replacement parts, and a level of comfort with disassembling electronics. If you're not experienced with such repairs, this is a point where professional assistance becomes advisable.
Black Screen, But Is It On? Display Issues
Sometimes, your Chromebook might appear dead, but it's actually powered on, just with a blank screen. This can be misleading, making you think it's a charging or power issue when it's actually a display problem.
Check for Other Signs of Power
Before assuming the worst, listen and look for other indicators that your Chromebook might be alive:
- Charging lights: Does the charging indicator light up when plugged in?
- Keyboard backlight: Do the keys illuminate when you press them or touch the trackpad?
- LED indicators: Are there any small LED lights on the side, indicating power or activity?
- Startup sounds: Do you hear any faint beeps, fan noises, or startup chimes?
- Vibration: Does the device vibrate slightly when you press the power button?
If you notice any of these signs, your Chromebook might be on, but its screen isn't displaying anything.
Connect to an External Monitor
The most definitive way to diagnose a black screen is to connect your Chromebook to an external monitor or TV. Use an HDMI cable or a USB-C adapter, depending on your Chromebook's ports and the external display.
If content displays correctly on the external screen, the issue is almost certainly with your Chromebook's internal display, its backlight, or the display cable connection. This rules out power or charging problems as the primary cause, shifting your focus to screen repair.
Ensure Screen Brightness Isn't All the Way Down
This is a simple oversight, but it happens! Accidentally hitting the brightness down key repeatedly can make your screen appear completely black, even when the Chromebook is fully powered on. Try pressing the brightness up key (usually a sun icon on the top row of your keyboard) several times to see if the display comes back to life.
Beyond Hardware: Software & OS Headaches
Sometimes, the culprit isn't a broken component but a software glitch or a corrupted operating system preventing your Chromebook from booting or managing power correctly. These issues can often be resolved without ever opening your device. For more general troubleshooting of software quirks, you might find broader insights in how to Troubleshoot your glitching Chromebook.
Hard Reset (Alternate Method: Refresh + Power)
This method of hard resetting specifically refreshes the hardware connections without touching your user data. It's particularly useful if your Chromebook is stuck on a black screen or unresponsive.
To perform this hardware refresh:
- Ensure your Chromebook is turned off. If it's on but unresponsive, hold the power button until it shuts down.
- Press and hold the Refresh key (the circular arrow icon, usually above the '3' key).
- While holding Refresh, tap the Power button.
- Release both keys as soon as your Chromebook starts up.
This action tells the system to re-initialize its hardware, which can often resolve issues stemming from minor firmware or boot-related glitches.
Boot into Chrome OS Recovery Mode
If your Chromebook consistently fails to boot or displays a "Chrome OS Is Missing or Damaged" message, you might need to enter Recovery Mode. This mode allows you to reinstall the operating system, but it's a more drastic step.
To enter Recovery Mode:
- Ensure the device is off.
- Press and hold the Esc and Refresh keys.
- While holding Esc and Refresh, tap the Power button.
- Release the Power button, but continue holding Esc and Refresh until the Recovery Mode screen appears (usually an exclamation mark and a message).
If you see the "Chrome OS Is Missing or Damaged" message, it indicates a critical OS issue. Your next step will be to create a recovery image.
Use Google's Chromebook Recovery Tool
When the Chrome OS itself is compromised, often due to an update gone wrong or corrupted files, you'll need to reinstall it. Google provides a straightforward tool for this.
Before you start, a critical warning: This process will restore your device to factory default settings and delete all files saved to internal storage. Ensure you back up any important files to Google Drive or an external storage device beforehand.
- You'll need another working computer (Windows, Mac, or Linux) and a USB drive or SD card (at least 8GB).
- On the working computer, open the Chrome browser.
- Go to the Chrome Web Store and search for "Chromebook Recovery Utility." Install the extension.
- Open the utility and follow the on-screen instructions to create a recovery image on your USB drive or SD card. You'll need to select your Chromebook model.
- Once the recovery media is created, insert it into your problematic Chromebook while it's in Recovery Mode.
- Follow the prompts to reinstall Chrome OS. This process is typically user-friendly and usually takes less than 5 minutes for the initial setup.
A fresh installation of the operating system can fix deep-seated software issues that are preventing proper function, including power and charging problems that might have been misdiagnosed as hardware failures.
Perform a Powerwash (Factory Reset)
A Powerwash is Chrome OS's equivalent of a factory reset. It completely wipes all data, settings, and user accounts from your device, returning it to its "out-of-the-box" state. This can resolve persistent software glitches, performance issues, and even some stubborn power problems that haven't responded to other fixes.
Warning: A Powerwash will delete all local data, including downloaded files, photos, saved Wi-Fi networks, and installed apps/extensions. Always back up important files to Google Drive or another cloud service before performing a Powerwash.
To perform a Powerwash:
- Open your Chromebook's Settings.
- In the left sidebar, navigate to System Preferences (or "Advanced" > "Reset settings" depending on your Chrome OS version).
- Under the "Reset" section, find and click the Reset button next to "Powerwash."
- In the confirmation pop-up, click Restart and follow the on-screen instructions. Your Chromebook will restart, wipe its data, and then guide you through the initial setup process as if it were brand new.
This is a powerful troubleshooting step for software-related issues, but due to data loss, it should be considered after less intrusive methods have failed.
The Unseen & The Severe: Internal Hardware & Environmental Factors
While many issues are external or software-based, sometimes the problem lies deeper within your Chromebook's internal hardware or is influenced by its operating environment. These are less common but important to consider.
Motherboard Inspection (Advanced Users Only)
If your Chromebook shows no signs of life, even after trying all the previous steps, a severe internal hardware failure might be at play. For those comfortable with electronics repair, a visual inspection of the motherboard can sometimes reveal obvious culprits.
This involves opening the Chromebook's case (which often voids warranties and requires specific tools). Once inside, carefully examine the motherboard and surrounding components for:
- Burn marks or discoloration: Blackened or brown areas on the circuit board often indicate a short circuit or overheating component.
- Swollen capacitors: Small, cylindrical components that appear bulging or leaking.
- Loose or disconnected cables: Particularly ribbon cables connecting various components.
If you observe any signs of burnt or extensively damaged components on the motherboard, the repair is beyond most DIY capabilities. Such damage usually necessitates a motherboard replacement, which is often as expensive as buying a new Chromebook.
Extreme Temperatures: A Hidden Foe
Chromebooks, like all electronics, are designed to operate within a specific temperature range. Exposure to extreme heat or extreme cold can temporarily disrupt their functionality, including power management and battery performance.
- Excessive Heat: Leaving a Chromebook in direct sunlight, a hot car, or using it on soft surfaces that block vents can lead to overheating. The device might shut down to prevent damage, or refuse to power on until it cools down.
- Extreme Cold: Similarly, exposing a Chromebook to very low temperatures can affect battery chemistry and screen performance, potentially preventing it from starting.
If your device has been subjected to such conditions, simply allow it to return to room temperature (ideally between 60-80°F or 15-27°C) for at least an hour before attempting to power it on or charge it again. Do not try to rapidly heat or cool it, as this can cause condensation or further stress.
When to Call in the Cavalry: Professional Repair
You've systematically worked through every troubleshooting step, from the simplest checks to the most advanced software resets and internal diagnostics. If your Chromebook still refuses to charge, power on, or hold a charge, it's a strong indication that the issue is a deeply rooted hardware problem that requires specialized tools and expertise.
At this point, it's time to consider professional repair.
- Check Your Warranty: First, verify if your Chromebook is still under warranty. If it is, contact the manufacturer or the retailer where you purchased it. An official service center will be able to diagnose and repair the issue, often at no cost.
- Local Repair Shops: If your warranty has expired or the issue isn't covered, seek out a reputable local computer repair technician. Look for shops with good reviews that specifically mention Chromebook or laptop repair. Be sure to get a clear estimate of repair costs before authorizing any work. Sometimes, the cost of a major hardware repair (like a motherboard replacement) might approach the cost of a new, entry-level Chromebook, in which case replacement might be a more economical option.
A professional technician has the diagnostic equipment and experience to pinpoint complex hardware failures, such as issues with internal power circuits, the battery management system on the motherboard, or deeply embedded charging port problems, and perform the necessary repairs safely and effectively.
Empowering Your Chromebook's Longevity: A Final Word
Successfully navigating the frustrating world of power, battery, and charging failures on your Chromebook is incredibly empowering. You've learned to approach complex problems with a systematic, logical mindset, proving that many issues aren't as daunting as they first appear.
Remember, prevention is always better than cure. Handle your Chromebook and its charger with care, avoid extreme temperatures, and perform regular software updates to keep your device running smoothly. By understanding these common issues and their solutions, you're not just fixing a problem; you're extending the life of your device and ensuring your digital world stays powered on. If you've exhausted these steps, you now have the clear path to professional help, armed with the knowledge of what might be ailing your trusted Chromebook.