Your Chromebook, a beacon of simplicity and web-centric computing, usually hums along without a hitch. But what happens when that reliable performance starts to waver? When your screen flickers, apps lag, or it refuses to charge? That's when you need to become a digital detective, adept at diagnosing general Chromebook glitches to restore its smooth operation.
Don't let a misbehaving Chromebook derail your productivity or entertainment. Most common issues have straightforward solutions, and with a little systematic troubleshooting, you can often pinpoint and fix the problem yourself. This comprehensive guide will equip you with the knowledge and steps to tackle everything from minor hiccups to more stubborn malfunctions.
At a Glance: Your Chromebook Troubleshooting Toolkit
- Start Simple: A quick restart often resolves many transient issues.
- Stay Updated: Ensure your Chrome OS is always running the latest version for bug fixes and performance improvements.
- Use the Diagnostics App: Your built-in assistant for checking hardware health like battery, CPU, and memory.
- Know Your Resets: Understand the difference between a hard reset (hardware refresh) and a Powerwash (factory reset) and when to use them.
- Backup Your Data: Always back up files to the cloud before performing any major system reset.
- External Checks: Rule out external factors like bad chargers, cables, or Wi-Fi networks.
- Isolate the Issue: Determine if a problem is system-wide, app-specific, or related to a particular website.
Your First Line of Defense: The Diagnostics App and Basic Checks
Before diving deep, leverage your Chromebook's built-in tools and fundamental troubleshooting steps. These often catch the culprit before you need more advanced interventions.
Get to Know Your Chromebook's Doctor: The Diagnostics App
Think of the Diagnostics app as your Chromebook's personal physician, offering a real-time snapshot of its vital signs. It's a powerful tool for quickly assessing hardware health and identifying potential issues with your battery, CPU, or memory.
How to Access and Use It:
- Click the round Launcher button in the bottom-left corner of your screen.
- In the search bar, type "diagnostics."
- Select the Diagnostics app icon (it looks like a heart monitor line).
Inside the app, you'll find crucial information like your Chromebook model, motherboard details, and battery health (including cycles and capacity). You can also view live data for CPU usage, speed, and temperature, as well as memory statistics. The best part? You can run various tests directly from here. Look for "success" markers to confirm components are working correctly. If you're consulting support, you can even "Save session log" for later analysis.
The Universal Fix: Turn It Off and On Again
It might sound cliché, but a simple restart can clear up temporary glitches, refresh system processes, and resolve a surprising number of issues, from screen flickering to sluggish performance.
Steps:
- Click the Clock in the lower-right corner of your screen.
- Select the Power icon. Your Chromebook will shut down.
- Once it's completely off, press and hold the physical Power button for a couple of seconds until it turns back on.
Stay Ahead of the Curve: Check for Updates
Google constantly releases Chrome OS updates that include performance improvements, security patches, and bug fixes. Running outdated software can lead to unexpected glitches, stability issues, or even prevent certain features from working correctly.
Steps:
- Click the System clock in the bottom-right corner.
- Click the Gear icon (Settings).
- In the left-hand menu, select About Chrome OS.
- Click "Check for updates." If an update is available, follow the prompts to download and install it, then "Restart" your Chromebook.
If you try to update but receive an error, first ensure you have a strong Wi-Fi or Ethernet connection (avoid cellular data if possible). If issues persist, a simple restart of your Chromebook often resolves update-related hiccups.
Tackling Specific Glitches: From Screens to Sounds
Once you've tried the basics, it's time to zero in on more specific problems your Chromebook might be facing.
When Your Screen Goes Haywire: Flickering and Black Screens
A glitching or flickering screen can be incredibly frustrating. It can range from a minor annoyance to a sign of a more serious underlying problem.
Investigating a Glitching or Flickering Screen
If your Chromebook's display is acting up, consider these troubleshooting steps:
- Change the Display Size: Sometimes, display settings can cause rendering issues.
- Click the Clock (bottom right) > Click the Settings icon > Select Device (left-hand menu) > Click Displays > Try making your Display Size smaller using the slider.
- Reset Chrome Flags: Chrome Flags are experimental features that can sometimes introduce instability or display glitches.
- Launch Google Chrome > Type
chrome://flagsinto the omnibox > Hit Enter > Select Reset All > When prompted, hit Restart.
- Try Another Monitor: This crucial step helps determine if the issue is hardware or software related.
- Connect your Chromebook to an external monitor using an HDMI cable or a USB-C adapter with an HDMI port.
- Outcome 1: If the external monitor also flickers, it's likely a software issue. Wait for a Chrome OS update or continue troubleshooting.
- Outcome 2: If the external monitor doesn't flicker, the problem is almost certainly with your Chromebook's internal display hardware, requiring repair.
- Is It Website-Specific? If the flickering only occurs on a particular website, the issue is likely with that site's graphic elements, not your Chromebook. You can contact the site owners if it's a persistent problem.
- Seek Repair: If all else fails and your screen issues persist, it's time to consider professional repair. If your Chromebook is under warranty, contact the manufacturer. Otherwise, check your insurance or find a reputable local repair shop. This can often resolve even the most stubborn display problems and help you Fix your glitching Chromebook permanently.
Fixing the Dreaded Black Screen
A completely black screen can be alarming, especially if your Chromebook seems otherwise operational (making noise, indicator lights on).
- Basic Checks First:
- Did the battery die? Plug it in and allow at least 30 minutes to charge before attempting to boot.
- Did it crash? Try turning it on with the power button.
- Is the screen brightness all the way down? Use the brightness keys on your keyboard (often F6/F7 or sun icons).
- Perform a Hard Reset: This refreshes hardware connections without wiping your data.
- Turn off your Chromebook (hold the Power button).
- Press and hold the Refresh button (usually a circular arrow) and simultaneously tap the Power button.
- Release the Refresh button when your Chromebook starts.
- Get It Serviced: If the black screen persists despite these steps, and you know the Chromebook is still working (e.g., you hear fan noise or indicator lights are on), it's likely a hardware fault. Check your warranty for service options.
Performance Woes: Slowdowns, Crashes, and Reloading Tabs
Is your Chromebook feeling sluggish? Are apps crashing, or do browser tabs constantly reload? These are classic signs of performance bottlenecks.
When Your Chromebook Runs Very Slowly
- Restart: As always, start with a simple restart to clear temporary memory and processes.
- Check for Updates: Ensure your Chrome OS is fully updated; performance improvements are often included in software releases.
- Close Unneeded Tabs and Apps: Chrome OS manages resources efficiently, but too many open tabs or memory-intensive Android apps can bog it down. Shut down anything you're not actively using.
- Use the Task Manager: Just like on a traditional desktop, your Chromebook has a Task Manager to identify resource hogs.
- Press Search + Esc (or Shift + Esc) on your keyboard.
- Review the list of running processes. Look for apps or programs consuming a lot of memory or CPU. Avoid ending "system" entries.
- Select the problematic app/program and click "End process."
Chromebook Frequently Crashes for No Reason
Beyond general slowdowns, inexplicable crashes can be a symptom of problematic software.
- Restart and Clear: Turn off your Chromebook, let it rest briefly, then restart.
- Remove Problematic Extensions or Apps:
- For Apps: Click the Launcher (bottom-left) > Click the Up arrow to see all apps > Right-click on the suspicious app > Select "Uninstall" (or "Remove from Chrome") > Confirm "Uninstall."
- For Extensions: Open your Chrome browser > Click the three-dot "Customize and control" icon (top-right) > Go to "More tools" > Select "Extensions" > Find the extension you suspect and click its "Remove" button, or simply toggle it off to see if the crashes stop.
"Aw, Snap!" or "This Web Page Is Not Available" Errors
These common browser errors often point to resource limitations or connectivity issues.
- Close Tabs/Windows: "Aw, snap!" frequently indicates low system memory. Close any unnecessary browser tabs and windows.
- Disable/Remove Extensions: As with crashes, a faulty extension can cause these errors. Try disabling them one by one to isolate the culprit.
- Check Internet Connection: A flaky Wi-Fi connection can prevent pages from loading.
- Clear Browser Cache: Old, corrupted cache data can interfere with page loading.
- Open Chrome > Click the three-dot "Customize and control" button (top-right) > Go to "More tools" > Select "Clear browsing data" (or press Ctrl + Shift + Backspace).
- Choose the time range and select the data you want to clear (cookies, cached images/files). Remember to save any important online passwords first.
- Click "Clear data."
- Try Incognito Mode: Opening the page in an Incognito window disables extensions and prevents caching, which can help diagnose if the issue is profile-related.
- Check Proxy Settings (Advanced): If you're using a network with proxy settings, incorrect configuration can block web pages.
- Click the System clock (bottom-right) > Click the Gear icon (Settings) > Under Network, select your current connection > Click it again > Expand the "Proxy" setting > Toggle on "Allow proxies for shared networks" and ensure any required proxy settings are correctly inputted. Only do this if you know your network's proxy configuration.
Input Troubles: Keyboard, Trackpad, Camera, and Microphone
When your peripherals stop responding, it can feel like your Chromebook is actively fighting you.
Keyboard or Trackpad Stops Working
- Restart the Chromebook: A good first step for any input device issue.
- Log in as a Guest: If the keyboard or trackpad works when you log in as a guest, the problem might be tied to your user profile. Try deleting your account and adding it back.
- Touchpad-Specific Fixes:
- Gently "drumroll" your fingers on the touchpad for about 10 seconds.
- Press the Esc key several times.
- Ensure the touchpad is clean and free of debris.
- Hard Reset Your Chromebook: This can often re-initialize hardware components.
- Turn off (hold Power button) > Press and hold Refresh button + tap Power button > Release Refresh button when Chromebook starts.
- Perform a Powerwash: If all else fails, a factory reset might be necessary. (See "The Ultimate Reset: Powerwash and Recovery" section below for full instructions).
Microphone Suddenly Stops Working
- Hard Reset: Perform a hard reset as described above.
- Check for Updates: Ensure Chrome OS is fully updated.
- App Permissions: Check if the app you're using has permission to access the microphone in your Chromebook's settings.
- Sound Settings: Click the System clock > Click the Right arrow icon next to the Volume slider > Ensure the correct microphone is selected as the input device.
Camera Stops Working
- Restart the Chromebook: The simplest fix for many camera glitches.
- Use a Different App: If the camera works in another application, the issue is likely with the problematic app itself. Try uninstalling and reinstalling it.
- App Permissions: Similar to the microphone, ensure the app has camera permissions enabled.
- Powerwash Your Chromebook: If software-related, a factory reset can resolve deep-seated issues. (See "The Ultimate Reset: Powerwash and Recovery" section below).
- Recover Your Chromebook: If a Powerwash doesn't work, a full Chrome OS recovery might be needed. (See "The Ultimate Reset: Powerwash and Recovery" section below).
Power Problems: Not Turning On or Charging
When your Chromebook refuses to power up or charge, it brings productivity to a screeching halt.
- Give It Time to Charge: If the battery is completely drained, it might need 30 minutes or more on the charger before it can even attempt to boot.
- Charge on a Different Circuit: Rule out a faulty wall outlet or an overloaded circuit. Try plugging your charger into an outlet in a different room, ideally one without other high-power appliances.
- Check the Charger: Inspect your charger for any physical damage. Look for frayed internal wires near the connectors, bent prongs, or unusual smells. A damaged charger needs to be replaced immediately.
- Hard Reset Your Chromebook: Even if it won't turn on, a hard reset can sometimes clear internal power states.
- Unplug the charger.
- Hold the Power button for 30 seconds.
- Plug the charger back in and try turning it on.
- If your model has a physical Refresh button: Press and hold Refresh button + tap Power button > Release Refresh button when Chromebook starts.
- Remove the Battery (Specific Models Only): Caution: Only attempt this if your Chromebook model allows for user-removable batteries and you are comfortable doing so. Consult your device's manual.
- Unplug the power adapter.
- Carefully remove the battery.
- Press and hold the Power button for 30 seconds to discharge any residual power.
- Replace the battery, plug in the adapter, and wait 30 minutes before trying to turn it on.
Connectivity Quandaries: Wi-Fi, Bluetooth, and External Displays
Connection issues can be particularly frustrating, cutting you off from the cloud-centric world your Chromebook thrives in.
Can't Connect to a Strong Wi-Fi Network
- Check Wi-Fi Icon: Click the System clock (bottom-right) > Click the Wi-Fi icon. If it appears hollow or gray, Wi-Fi might be toggled off. Click it to turn it blue (enabled).
- Try a Different Network: If your Chromebook connects fine to another Wi-Fi network (e.g., at a coffee shop or a friend's house), your home router might be the culprit. Consider a router upgrade if it's an older model.
- Restart Your Chromebook: A simple restart can often resolve temporary network adapter issues.
- Forget and Reconnect: In Wi-Fi settings, forget the problematic network and then attempt to reconnect, re-entering the password.
- Restart Your Router/Modem: Power cycle your internet equipment (unplug for 30 seconds, then plug back in).
Bluetooth Isn't Connecting
- Verify Specifications: Not all Chromebooks come with Bluetooth capabilities. Check your model's specifications.
- Check Bluetooth Icon: Click the System clock > Check the pop-up menu. If the Bluetooth icon is gray, it's disabled. Click it to enable (turn blue).
- Toggle On/Off: Turn Bluetooth off and then back on to reset connections.
- Pairing and Proximity: Ensure the Bluetooth device is in pairing mode, the codes are accurate, and it's within close physical proximity to your Chromebook. Avoid obstructions.
Can't Connect to a Second Screen
- Check Display Settings:
- Click the System clock (bottom-right) > Click the Gear icon (Settings) > Select Device (left) > Click Displays (right).
- Ensure your external display is detected and selected. Adjust options like rotation, centering, TV alignment, or how multiple screens are arranged (mirroring vs. extending).
- Disconnect/Reconnect (USB-based docks): If using a USB-based dock or adapter, disconnect it, wait a few seconds, then reconnect firmly.
- Update Chrome OS: Ensure your Chromebook is running the latest software, which often includes driver updates for external displays.
- Test Cable/Adapter: If possible, try a different HDMI cable or USB-C adapter to rule out faulty hardware.
Can't Hear Anything on My Chromebook
- Obvious Checks: Are headphones disconnected? Are external speakers powered on and working?
- Adjust Volume: Click the System clock (bottom-right) > Adjust the Volume slider to a higher level.
- Change Sound Input/Output: Click the System clock > Click the Right arrow icon next to the Volume slider. Ensure the correct audio device (e.g., internal speakers, headphones) is set as the output.
- Reset Your Chromebook: A hard reset can sometimes resolve audio driver issues.
Can't Get My Printer to Work with My Chromebook
- Printer Settings: Go to your Chromebook's Settings and ensure your printer's information is entered correctly.
- Remove and Re-add: Try removing the printer from your Chromebook's settings and then adding it again.
- Printer Firmware: Check your printer manufacturer's website to see if its firmware needs to be updated. Outdated printer firmware can cause compatibility issues with Chrome OS.
App and Software-Specific Quirks
Sometimes the issue isn't with the Chromebook itself, but how it interacts with specific applications or file types.
Can't Use My Word Docs on My Chromebook
Chromebooks are optimized for Google's ecosystem.
- Use Google Docs: Google Docs can view and often edit many Microsoft Word files directly. It's the native solution.
- Microsoft Word Android App: If your Chromebook supports Android apps, download the official Microsoft Word app from the Google Play Store for a more familiar experience.
- Office Online: Access Word documents via the web version of Microsoft Office if you have a Microsoft 365 subscription.
Zoom Doesn't Work on My Chromebook
Zoom has evolved its support for Chrome OS.
- Use the Progressive Web App (PWA): The Chrome OS app for Zoom is no longer actively supported. Instead, use the PWA version of Zoom, which you can install directly from your browser. Simply visit zoom.us in Chrome and look for the install prompt.
- Family Link Settings: If using a student account managed by Family Link, certain Zoom features (like video) might be restricted.
- Switch to a parent account to adjust Family Link settings.
- Alternatively, the student might be able to manually enter the Zoom Room number to bypass some Family Link limitations, though some features (e.g., video recording) may remain limited.
The Ultimate Reset: Powerwash and Recovery
When basic fixes and targeted troubleshooting fail, you might need to take more drastic measures to restore your Chromebook to a pristine state. These actions essentially reinstall or reset the operating system.
Understanding the Big Three Resets
It's crucial to understand the difference between these three levels of resetting your Chromebook:
- Hard Reset: This is the least intrusive. It refreshes your Chromebook's hardware settings (keyboard, camera, etc.) without affecting your user data. It's often used for unresponsiveness or peripheral issues.
- Powerwash (Factory Reset): This restores your Chromebook to its original factory settings, effectively wiping all user data, accounts, and downloaded apps. It's like getting a brand-new device. You'll need to re-link your Google account and redownload apps afterward.
- Recovery: This is the most thorough reset. It completely reinstalls Chrome OS from an external source (like a USB flash drive) when the operating system itself is damaged or corrupted. This is used when your Chromebook displays messages like "Chrome OS is missing or damaged."
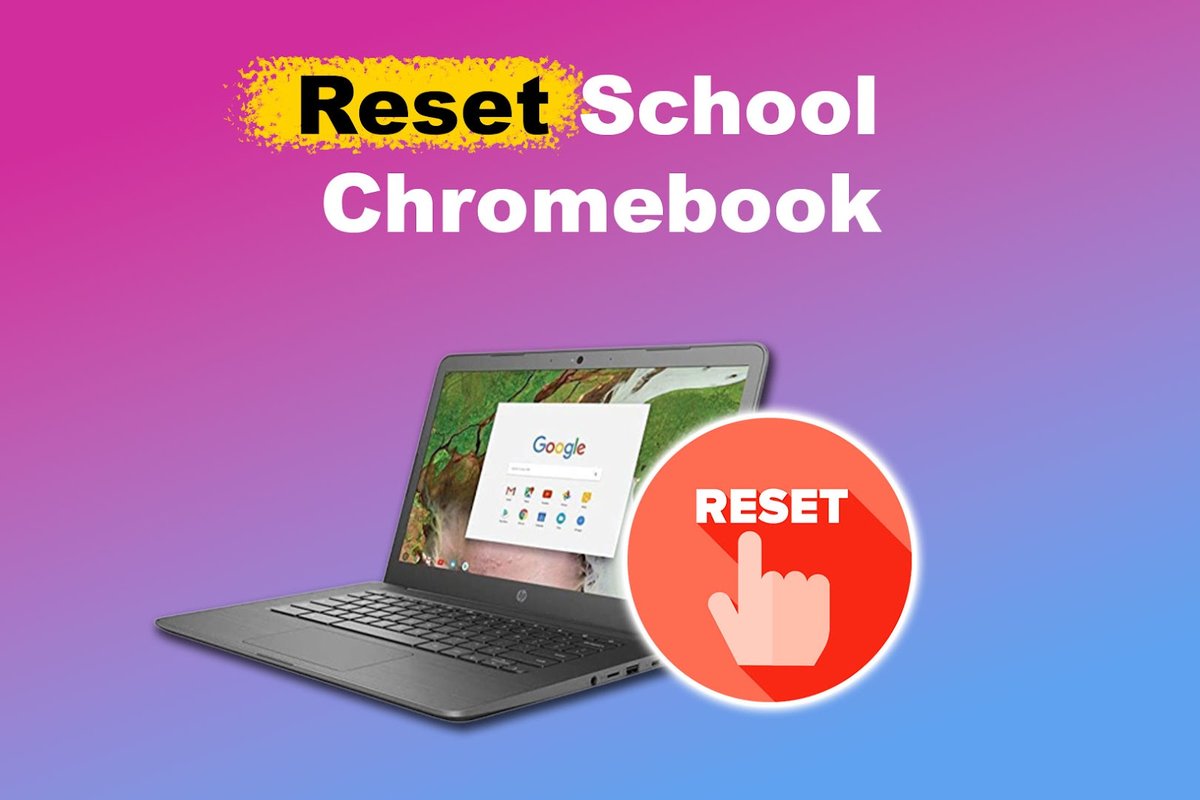
Performing a Powerwash (Factory Reset)
A Powerwash is a powerful solution for persistent software glitches, performance issues, or if you're preparing to sell or give away your Chromebook.
Actionable Insight: Crucially, back up all your data to the cloud (Google Drive is integrated) or an external hard drive BEFORE performing a Powerwash, as all local data will be wiped.
Steps:
- Sign out of your Chromebook.
- At the sign-in screen, press Ctrl + Alt + Shift + R.
- Click "Restart."
- On the next screen, click the blue "Powerwash" button.
- Click the blue "Continue" button to confirm.
Your Chromebook will restart and go through the initial setup process, just like when it was new.
Recovering Your Chromebook (Reinstalling Chrome OS)
If your Chromebook keeps restarting, displays "Chrome OS is missing or damaged," or a Powerwash didn't resolve your issues, a full Chrome OS recovery is likely needed.
Requirements:
- The problematic Chromebook.
- A separate working computer (Windows, macOS, or another Chromebook) with the Chrome browser installed.
- An 8GB or larger SD card or USB flash drive.
- Your Chromebook's model number (usually found on a sticker on the bottom).
Steps to Create a Recovery Drive:
- On your separate working computer, open the Chrome browser.
- Install and launch the "Chromebook Recovery Utility" app from the Chrome Web Store.
- Click "Get started."
- Enter your Chromebook's model number or select it from the list.
- Click "Continue."
- Select your recovery media type (SD card or USB drive).
- Click "Continue" > Then "Create now." The utility will download and write the Chrome OS image to your drive.
Steps to Perform Recovery on Your Chromebook: - If your Chromebook displays the "Chrome OS is missing or damaged" message, simply insert the recovery drive.
- Follow the on-screen prompts.
- Some Chrome OS devices have a physical recovery button (often a small pinhole); you might need to press this while powering on to initiate recovery mode. Consult your device's manual for specific instructions.
To Erase Recovery Media:
Once you're done with recovery, you can reuse your SD or USB drive. - Open the Chromebook Recovery Utility app on your separate computer.
- Click the Gear icon (top right).
- Select "Erase recovery media."
- Select your storage device > "Continue" > Verify data > "Erase now."
Wrapping Up Your Troubleshooting Journey
Mastering the art of diagnosing general Chromebook glitches isn't about being a tech wizard; it's about applying a systematic approach. From simple restarts to utilizing the powerful Diagnostics app, and understanding when to deploy a Powerwash or even a full recovery, you now have a robust toolkit.
Remember, start with the easiest fixes and gradually escalate. Document what you've tried, and if you reach a point where professional help is needed, you'll have a clear history of troubleshooting steps to provide to support. With these insights, you're well-equipped to keep your Chromebook running smoothly, ensuring it remains the productive, frustration-free tool it was designed to be.